Showing posts with label #heroarts. Show all posts

Tuesday, May 4, 2021

Fun Flip Flop Shaped Card W/Free Template--"A Blog Named Hero's" Shaped Card Challenge!

Hello!!

It's a sunny day here in Ohio, but too cold just yet to go to the beach.  But I can dream!!


I don't have a flip flop die and decided not to "cheat" and use my Scan 'n Cut because many folks don't have them.  So, I made an "old-fashioned" hand drawn template!  You can download it free below.  I also have all the supplies linked below for you convenience (AFIL-Thank You for your support!)

All of the instructions are included on my Youtube video also linked below.  I hope you will enjoy it (and if you do...please like, subscribe and hit that bell for notifications!)  
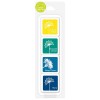


 Flip Flop Template


Supply List:


Tuesday, November 19, 2019

How to Make a Christmas Card That's Sew Easy! A Blog Named Hero "Muted Tones" Challenge!

Hello!

Here is my first project inspiration for the November "A Blog Named Hero" Challenge of "muted colors."  This project may look familiar because the background is a leftover piece from an earlier card.  Always save those scraps!  This was simple to make and quicker than most.  The stitching to me is quicker than coloring and easily mass-produced on the go!  The supplies are listed below.  For the full tutorial, please visit my youtube link also below (and I hope you'll consider subscribing!)


I die cut the scrap from a rounded rectangle infinity die, but my tape wasn't secure and the paper shifted.  So, never throwing anything out (Never give up!  Never surrender!) I just recut to straighten out, but it does leave an odd size compared to the rest.  Oh well, our secret!

Next, I die cut the stitched tree in the center and stitched with hand-dyed muted green embroidery floss.  I added a garland of red floss with gold glass seed beads.  Next I added a star brad and cut a square of corrugated cardboard for trunk.  

I layered this with the muted red & green paper on top of the Neenah Desert Storm top fold card base.

Easy, peasy!


Hope you will give this a try!  I will be back very soon!
Gale

Tuesday, October 1, 2019

How To Get Dye Inks To Pop On Dark Card Stock!

Hello again!


This month's "A Blog Named Hero" Challenge is "Inspired by fellow creator." I chose Jennifer McGuire showing how to get dye inks to pop on dark card stock.  The supplies and her video are linked below as well as the challenge link.


I've had several requests for more shapes and different folds, so this card will fit in #10 letter envelope.  It measures just under 4.13" x 9.5."

I used Neenah Desert Storm card, Hero Arts Unicorn White pigment ink and a variety of dye inks as well as Hero Art's Joy Stamp 'n Cut set with the Paper Layering Poinsettia.

First stamp images with the white ink and let dry thoroughly.  I didn't even use a Misty for this, though it might have been quicker.

Then stamp again with the dye ink, offsetting it slightly to give a shadow effect so it will "pop."  I splattered it a little bit with a mix of water and gold ink.

I added some gold Stickles to the centers of the flowers and Delicatus gold ink to the edges and let dry.  I diecut and built the Joy and Poinsettia, then added Midas Touch for some shimmer.  Finally I wrapped some gold vellum strips to make it look like a gift and layered on background, then card base.

Here are links (afil) to the supplies I used.  Thank you so much for using these links!


Here is the link to Jennifer's tutorial:
https://youtu.be/fJzLXse13Jg
Here is the link to join the "A Blog Named Hero" Sept. Challenge:
http://ablognamedhero.com/2019/09/september-challenge/

Until next time,
Gale

Thursday, August 22, 2019

Feliz Cumpleanos Card To Celebrate Scrapbookdotcom's 20th Birthday!!

HELLO! (Hola!)

Today I'm posting a card to celebrate Scrapbook.com's 20th Birthday!  They wanted to expand their offerings with an exclusive "Sentimentos Espanoles" stamp set for our Spanish speaking friends!  All of the supplies are linked below (afil) and I really appreciate it when you those links or or the ones on the right margin to support the blog/channel so I can bring you new, free content!

(FYI, be sure to come back often as there are many cards that I don't post a Youtube tutorial on, that I place here:)


Here is a close up of the card: There is shimmer, but it's hard to see, however, it's there in real life!


Here is what I did (I actually have a few step outs since I didn't video!):

I coated an A2 size sheet of heavy card stock with a double sided-adhesive sheet and trimmed down.


I die cut sentiment strips in different widths.


 Next, I stamped the sentiment on the strips so that it appeared to wrap around.

Then I direct-to-paper colored the strips to make sort of a rainbow.


I started in the middle with the widest strip and laid on the exposed adhesive (very carefully as it's sticky!) with a ruler to help keep things straight.  To keep from being too busy, I used blanks in between. 

 I was sad to lose most of the top and bottom sentiment lines, but I still needed to trim so I could have a small border around the card front.


I place the trimmed piece on a slightly larger black rectangle, then mounted to my top fold card base.

Fun and done!  If you have any questions or comments please leave them below.  I love hearing from you!!  Once again, Happy 20th Birthday to Scrapbook.com!


Until next time,
Gale

(Disclosure:  Part of the supplies I used were provided by Scrapbook.com for me to try out.  However, my opinions are my own and if I didn't like them, I would say so!)

Thursday, July 18, 2019

How To Make Faux Stained Glass Ornaments: Christmas in July Hop & Giveaway!

Hi again!!  
Welcome back to a fun new project!


It's Christmas in July here at the 'Creek!  A group of crafty friends and I are celebrating with a hop of course!  


The ornament above features the Hero Arts Season of Wonder Fancy Ornament die.  All the info is in the description box of my tutorial below as well as picture supply links (afil) at the bottom of this page.  Thank you for using these links!  It is greatly appreciated!


There is actually a second ornament that took on a life of its own.  Here's what they look like in the sun!

Joy die by Pretty Pink Posh

This project was inspired by Lindsay Adreon of "Crafting While Caffeinated"  Here is her link:  https://youtu.be/mRw82TTVyqk

Hope you enjoy the video and come back to see me soon!
Gale


Tuesday, May 28, 2019

Pretty Pinata Birthday Card--A Blog Named Hero's May Challenge "Celebrate"

Hi & Welcome!


Today's card is a fun slider... I cheated and used patterned paper:)  I hope you like it too!  The supplies are linked below (afil).  I didn't do a YouTube tutorial (daughter's wedding, work, etc.) but here's what I did:

1.  I diecut the pinata on white heavy cardstock for a base.  Then I cut two more out of patterned paper, being careful to use the same spot so colors matched underneath flaps.

2.  I glued the first colored layer flat to white one, then lifted where possible the flaps on the 3rd layer, then glued it to second.  

3.  I diecut a slightly less than 4.25" x 5.5" white card and white fun foam with a slider die.  I gave the foam time to puff back up before gluing to back of the front card.  Then added foam tape around for extra lift to allow slider to move.  I attached a slider plastic disk (you could use foam tape) to the center of a penny and let dry.

4.  I attached a bit of white card on the slider area of the 4.25" x 5.25" black base so it would show through to front.  I put the penny in the track, then adhered the front panel.  I checked to make sure penny would slide freely before attaching the pinata to the slider disc.  

5.  I wrapped some baker's twine around his neck and made a bow.  ( I did this loosely and added bow so he didn't look like he was on a hangman's noose!  LOL!)  I gave him a googlie eye for more fun.

6.  I taped some twine behind him and the sentiment banner strip which is clear heat embossed and edged with black marker.  Then added some of the fun candy to finish it off!  Then I glued him to the slider disk.

Here is the little guy in action:

Here are the supplies I used.  I really appreciate it when you use these links as I buy my own supplies and the small commission I get helps me buy new things to show you!


Friday, April 19, 2019

Easy Masked Card--"A Blog Named Hero April CAS Card Challenge"

Hello again!

Dare I say Spring has sprung???  I'm ashamed to not have gotten any Easter cards out, but Happy Easter everyone!  This month the challenge is CAS "Clean and Simple" cards.  I struggle with the exact definition of CAS, but I decided to go with lots of "blank" space, minimal layers and the only embellishment was shimmer on the flowers.  The supplies are linked below (afil).

I really miss my Iris bed from my last home.  My favorites were the variety of purple ones (and the pink, salmon, blue, yellow...LOL!)


To do this, I am doing some simple masking of the Hero Arts Iris Color Layering stamp set.  Once again, I am only using on part of the set, this time the outline.

Since I am going to color with Derwent Inktense Pencils, I stamped with a permanent black ink on bristol paper.  (If I were using more water, I would've used watercolor paper, but wanted paper smooth this time.)

Here is what the card looked like after masking the flowers and adding Inktense pencil to the edges.  I just pulled the color in from the edges with water. 


I added Hero Arts Iridescent watercolor to add some shine.  It came in a kit, so the closest thing available is H. A. Shimmer spray...just make a puddle on your mat to apply.  The supplies below are either what I used or as close as I could get (I have lots of really old tools/supplies!)

I let the watercolor dry on it's own, then layered it as shown, adding a black, heat embossed sentiment from the same Iris set to complete the card.

Hope you will join in the fun with the challenge (it's linked at the top in blue.)  I'll be back again soon!  If you would like more ideas, please go to index page and browse or to my channel youtube.com/c/galethompson  You are invited to subscribe there and also to my blog below. 

Here are the links!


Have a great week!!

Gale

Sunday, March 17, 2019

A Quick Peek Inside Simon Says Create 2019!!


Hi!

My dear crafty friends Wanda and Elesa and I had a great time at the Simon Says Create event near Columbus, OH.  We had a great time crafting, shopping and people watching (lots of familiar faces from the industry were there!)  I think there were 40 vendors participating and I was only able to get to a handful, but I wanted to share what I could with you!  

There are photos of the finished projects below with vendor links (afil) as I could never remember all the products and get this posted anytime soon!  The vendors not linked are available at Scrapbookcom and of course, Simon Says Stamp.

Enjoy!  Here is the video-


Here are the projects I made in one afternoon!  Whew!  I don't make that many in a couple months normally!!


Jillibean Soup:  (that's me with my create 'n take:)


Newton's Nook:


Lawn Fawn:


Ink on 3:


Thermoweb:                                                            


Mama Elephant:


Brutus Monroe:


Memory Box:


LaLaLand:


I hope you enjoyed this little peek as well as the video and that you will come back soon!  Please consider subscribing to my channel as well as here at the blog so you won't miss anything!

Until next time,
Gale

Monday, February 25, 2019

How To Make A Mirror Image & Spinner Card: Hero Arts MMH Feb '19 Kit

Hello Friends!!


It's time to party!  I can't dance, but I can make a dancer on TV!  Here is my Art Deco card featuring the February 2019 My Monthly Hero Kit.  All the supplies have picture links (afil) below.

Here it is in action:


The complete YouTube tutorial is below:


hanks so much for stopping by!!  I will be back soon!


Gale

Monday, October 8, 2018

How To Make A Snowflake Spinner Card! (with Process)

Hello everyone!

I am so sorry that there has been a large gap between videos, but I have some very good excuses... I will do a post on them soon, but want to cut right to the chase here....


Here is the video link!


I had requests to do a spinner card and a process video, so I thought I would honor both requests at once!  I step out most things in the video, but here are the basic things I do with most projects:

1.     Clean up craft area.  This may sound silly, because I often use the same supplies.  But I put everything away for a fresh start.  It de-clutters my mind.

2.     Where do my ideas come from?  

  • Sometimes I have an idea when I buy it (often I forget though)
  • I make a crude sketch of placement
  • Sometimes there is a specific technique I want to try and go from there.
  • Sometimes it's a new supply I can't wait to use.
  • I may need a card for a certain occasion or season
  • Rare occasions:  A video hop or card challenge (wish I could do more of those!)
  • Lastly, photos from FB, YT or Instagram, but I try to avoid that as I want in my head my project to be totally "original" to me.
3.    Gather supplies.  I am forever getting up and chasing them down which takes time and my focus away.

4.     Make sure you have time for do-overs.  The best laid plans can go awry and spills, smears, etc occur without warning!

5.     Mock up your card with copy paper or scraps.  Pick colors, choose sentiments.

6.     With this card I ask myself "How can I make this work?"  The ornament has a hole in the middle:  I could
  • leave open and have sentiment show through to inside.
  • sandwich vellum or acetate, but this sentiment isn't symmetrical;
  • could color acetate or vellum or use colored paper
7.     How do I make spinner work freely?  Will have to enlarge circle around it.

8.     What embellishments, if any?

My process took a different direction when I accidentally cut the ornament out of the front instead of the larger circle.   That meant I couldn't use that part of the blue piece.  That's when I got out the metallic paper.  I think it looks better this way (Happy accident!)  

After I put silver Nuvo drops on snowflakes, they didn't show up like I had hoped.  So, I waited for them to dry and scraped them off.  I replaced with sequins.

I took that leftover snowflake and made a place setting name card.  I never let extra pieces go to waste!  Save them if you can't use them right away.  They can inspire another project or at least enhance one!

I hope this helps and know you are not alone in the creative struggle!!!

Here are the supplies I used:

Friday, June 15, 2018

How To Make A Quick Celebration Card "Just Cards" Video Hop

Hello!

Welcome to the June "Just Cards" Hop--the theme is Wedding/Anniversary cards.  Please visit all the stops on the hop as everyone has worked hard to make it inspiring for you!  Just find the list below and hop along!  My product order took 3 weeks to get here, so I improvised with things that could be used for either.


This card features Altenew's Leaf Burst Stencil with Tonic's mirror card stock.  It is perfect for any occasion and easy to make!  The supplies are listed below with picture links.  (These are affiliate links meaning I receive a small commission on products purchased through the links at no cost to you.  As Jennifer McGuire stated perfectly "It's like tipping your waitress for good service." I really appreciate it!)

Here is the list of the hop stops:


I hope you enjoy this and will consider subscribing here to the blog and on my YouTube Channel 
YouTube.com/c/GaleThompson  I plan to start posting sales and things on the The Darby Creek Diaries Facebook page, so you might want to check in on that too!  If you hit like I believe you will be sent the post.  Trust me, I don't post there a lot, so don't worry about that!

Have a fabulous week!!!

Gale


Wednesday, February 28, 2018

Oxide Inks & Paper Layering Koi---Just Cards Video Hop!

Hi everyone!

Welcome to my stop on the "Just Cards" Video Hop!  The folks participating are listed below the video link and will also be listed under the video on my YouTube channel in the description box.  Just click on the link below with the arrow to get to the video!  (Video won't be "live" until 2 p.m. on Weds. Feb. 28th! I had to post this early because I can't trust the timer and am going to be out:(  Don't forget to hit that subscribe button so you won't miss any future videos!)

This month's theme is "masculine."  The products used are listed at the bottom of the page.  Thanks for "hopping" by!


Please hop to the other stops and enjoy!  Show us some love with subscribing, liking and commenting!  

Gale:  https://youtu.be/Vg6iO-YOgk0   You are here!
Christine:  https://youtu.be/1Nwyq0Ylfdc
Nadine:  https://youtu.be/ziNU_cTemdk
Alicia:  https://youtu.be/a634OS0s9gk
Koren:  https://youtu.be/iy7xqcSKgQE
Linda:  https://youtu.be/Nb45FgRzayE
Anna:  https://youtu.be/ZjCFywdfrW0
Monica:  https://youtu.be/DTvW_AB8Djc
Terri:  https://youtu.be/t_OBdAhqMVo

Here are the products I used:  Just click on the links for more info!


Have an awesome day!
Gale

Tuesday, May 2, 2017

Gale's Gallery XXX Part II: Simon Says Create! Event--Create 'n Takes

Hello again!

As promised, here is a look at some of the create 'n takes from the Simon Says Create! event last weekend.  All of the products that are available (some were sneak peeks) are linked below if you're in a shopping mood!  Due to my slow learning curve (and large product listing) they are linked to Simon Says Stamps, but these and other products are available for browsing at the store links down the right margin.  These help support the blog at no cost to you whatsoever....


Let's start in the back and go L-R:  If you click on photo you can see a larger image.

Chibitronics Battery-operated light up card.  The candle lights up.  This is a lot less complicated than I originally thought and fun!

Wow! Double-sided adhesive with glitter stripes.  I just guesstimated the widths as they were about to close for lunch when there was finally a seat at the table.  Stamps from Wow! "Born to Sparkle" set.

Cas-ual Fridays Die-cut thanks, stamp "Full on Floral" background, make a 1" split, flip that middle piece over to show plain side, pop up with foam tape.

Newton's Nook Birthday card using Copic Markers and "Newton Loves Cake" stamp set and dies.

Concord & 9th Features their new super simple "Floral Fill-In" patterned papers and stencils that work together allowing for you to choose any color combo you want.

Sizzix Easy and cute Cupcake Fold It! die card.

Middle row L-R:

Gelli Plate Do it yourself print making plate usable with any paints, dyes or whatever.  These tags were made with Distress Oxide Inks.

Sizzix Happy Birthday Drop In Die set.  This set is reasonably priced and easy once you get the hang of it.

Right At Home Layered floral stamps from their "Bunny Hugs" set.

Lawn Fawn  Scalloped Box Pop Up Die on Perfectly Plaid cardstock.  Stamped with Versamark Onyx black ink using "Elphie Selfie" set and colored in with Copic markers.

Waffle Flower Ink blending on Misti tool with Stitched Cacti stamp set.

Mama Elephant  Big impact with just blowing watercolors through a straw.  Stamped with "Hello Friend Wishes" set.

Hero Arts  Peacock Layer Stamps and Die set using Hero Arts coordinating ink cube pack.

Sugar Pea Designs  Stamping on fabric bag with Walnut Stain distress ink (and it didn't leak through!)  The stamp set we used was a sneak peak, but I linked similar ones below.

I would be remiss if I didn't mention some of the other great tables that didn't have open seats at the right time for me:  Neat & Tangled, WPlus9 and Altenew to name a few.


As they say, a great time was had by all!  Hope you enjoyed my first post using Inlinkz!

Until next time,
Gale